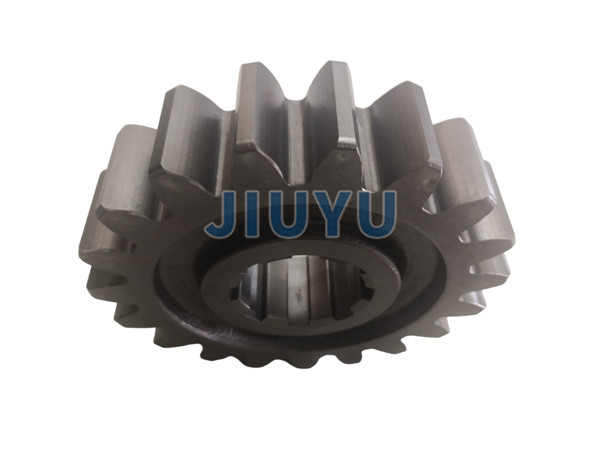
Introducing to you from the aspects of lubrication and sealing, failure modes, detection and quality control of industrial gears:
Lubrication and Sealing
Lubrication Method: Different lubrication methods can be used according to the working conditions and speed of the gear.
. Common lubrication methods include oil bath lubrication, which involves immersing gears in an oil bath and lubricating them by bringing oil to the meshing tooth surface through gear rotation. This method is suitable for medium and low-speed gears; There is also oil spray lubrication, which sprays lubricating oil onto the gear meshing area through the oil nozzle, which can effectively cool and lubricate high-speed and heavy-duty gears Lubricant selection: It is necessary to comprehensively consider factors such as the working temperature, load, and speed of the gear. Generally speaking, high viscosity lubricating oil is suitable for heavy-duty and low-speed gears, which can form a thick oil film and withstand high pressure; Low viscosity lubricating oil is used for high-speed gears to reduce stirring losses and heat generation. In addition, for gears working in high temperature, humid, or corrosive media environments, lubricating oil with corresponding high temperature resistance, emulsion resistance, and corrosion resistance properties should also be selected Sealing device: To prevent lubricating oil leakage and external impurities from entering, gearboxes are usually equipped with sealing devices. Common sealing methods include organic (based on actual reports) mechanical seals, labyrinth seals, lip seals, etc. Excellent mechanical seal performance, suitable for high-speed and high-pressure applications; Maze seals prevent oil leakage through complex channel structures and are commonly used in high-temperature and high-speed gearboxes; The lip seal structure is simple, easy to install, and can effectively prevent oil leakage and dust from entering. It is widely used in various industrial gearboxesFailure mode
Tooth surface wear: Due to the relative sliding between tooth surfaces and the invasion of external impurities during the meshing process of gears, tooth surface wear can occur.
. Wear and tear can reduce tooth thickness, affecting the transmission accuracy and load-bearing capacity of gears, and in severe cases, can lead to gear failure. Commonly found in open gear transmission or gear systems with harsh working environments Tooth surface bonding: In high-speed and heavy-duty gear transmission, the pressure and temperature between the tooth surfaces are high, and the lubricating oil film is prone to rupture, causing direct contact and adhesion between the two tooth surface metals. As the gear rotates, the tooth surface metal is torn off, forming a bonding phenomenon. Glue bonding can seriously damage the integrity of the tooth surface, resulting in the loss of transmission capability of the gear Tooth surface pitting: During gear meshing, the tooth surface is subjected to alternating contact stress. When the number of stress cycles reaches a certain value, small fatigue cracks will appear on the tooth surface. As the cracks propagate, the metal particles on the tooth surface will fall off, forming pitting like pits, known as pitting corrosion. Pitting corrosion will reduce the contact strength of the tooth surface and affect the smooth transmission of the gear Tooth breakage: Due to the significant bending stress at the root of the gear teeth during torque transmission, when the bending stress exceeds the strength of the gear tooth material, the gear teeth will break. In addition, factors such as impact loads and root stress concentration can also increase the risk of gear tooth breakage. Tooth breakage is a serious form of failure that can cause sudden interruption of gear transmissionTesting and Quality Control
Geometric Accuracy Testing: By using measuring tools such as calipers, micrometers, gear measuring centers, etc., the geometric parameters of the gear such as modulus, number of teeth, tooth profile, tooth direction, and tooth pitch are measured to confirm that the machining accuracy of the gear meets the design requirements.
. For example, a gear measurement center can accurately measure various errors of gears and compare them with standard values to promptly identify problems during the machining process Tooth surface quality inspection: Using optical microscopes, electron microscopes, and other equipment to observe the roughness and microstructure of the tooth surface, and check for defects such as cracks, scratches, and wear on the tooth surface. At the same time, through surface hardness testing equipment, the hardness distribution of the tooth surface is detected to confirm that the tooth surface has sufficient hardness and performance Material performance testing: Conduct chemical composition analysis, mechanical property testing, etc. on gear materials to protect them from meeting design requirements. For example, determining the strength and toughness of materials through tensile testing, observing the microstructure of materials through metallographic analysis, and evaluating the quality and heat treatment effect of materials Assembly quality control: Strictly control the installation accuracy of gears during the gear assembly process, such as axial positioning, radial runout, meshing clearance, etc. By using one-on-one assembly tools and testing instruments, it is confirmed that the gear assembly meets the requirements, protecting the smoothness and excellence of the gear transmission


